1.4.4. OpenAPI Management enabler
1.4.4.1. Introduction
The OpenAPI Management enabler is the enabler responsible for managing the APIs in the Assist-IoT project by allowing the enablers of the project to publish their APIs, monitor their lifecycles and make sure that that the needs of external third parties, as well as applications that using the APIs, are beeing met. Hence, the main functionalities that it serves are to collect all the APIs that are used by the Assist-IoT enablers in order to proxy them through the API gateway to the external users, to be used as an API portal from which the developers can push their OpenAPI documentations to the API-gateway ,store them in an API library and interact with them through SwaggerUI.
This enabler has reached a TRL of 6 during the execution of the ASSIST-IoT project.
1.4.4.2. Features
The OpenAPI management enabler has the following features:
OpenAPI Publisher: A back-end client from which the developers can publish their OpenAPIs definitions through the API gateway, using the standard HTTP (GET, POST, etc.) methods. All the endpoints of the client are secured with Keycloak IdM.
OpenAPI Portal: A front-end portal application that acts as a library of OpenAPI definitions. It is also integrated with the API publisher and allows developers to push their definitions through the front-end and interact immediately with them through Swagger UI. In order to have access to the fronted you need to have a Keycloak account.
OpenAPI Gateway: Kong API Gateway (OSS) has been selected as the OpenAPI gateway for the Assist-IoT. Kong Gateway is a lightweight, fast and flexible API gateway. The Konga API Manager is used as an interface to manage Kong Gateway behind a proxy. Additionaly, we are using kong-oidc open-source plugin to integrate Kong Gateway with Keycloak IdM and secure the registered endpoints.
1.4.4.3. Place in architecture
The OpenAPI Management enabler is part of the horizontal plane enablers, on Application and Services plane.
1.4.4.4. User guide
As a developer or open-caller in the Assist-IoT project a user should have an account on Keycloak Identity Manager in order to authenticate. This account will be used to authenticate in the Portal page and secure enabler’s endpoints.
To kick-start the process and for testing purposes we have created three demo accounts with Keycloak IdM (see Create demo-users in Installation Section).
1.4.4.4.1. Portal Login
When accessing portal (testing-cluster address http://10.10.10.2:30300) a developer we prompt into a login page:
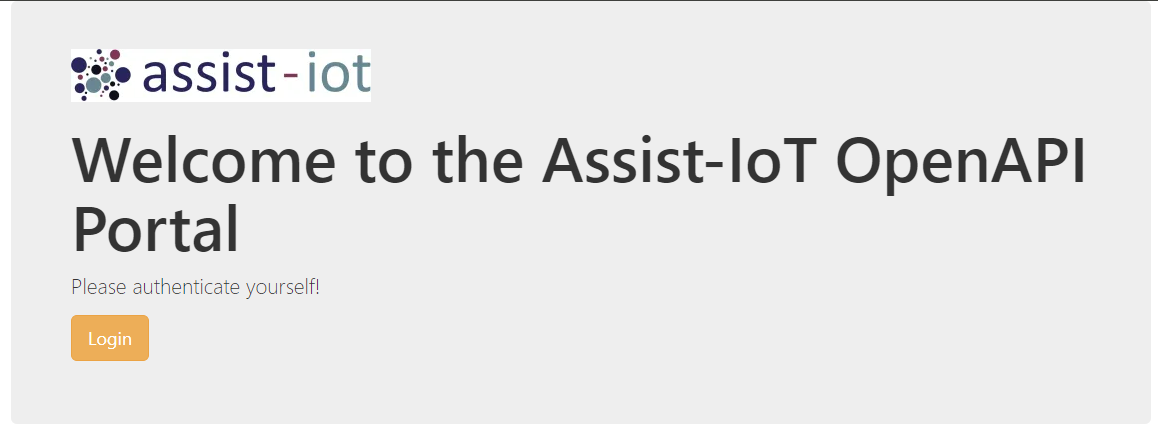
After hitting the login button we redirect to keycloak.
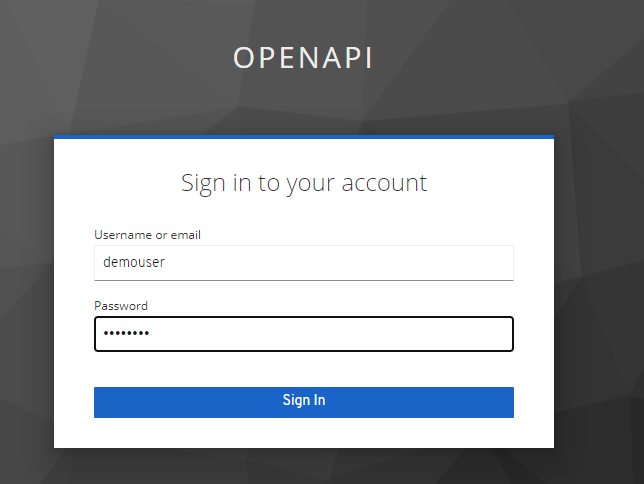
We sign in as demouser, password: demouser. After the successful authentication we redirect back to the main portal interface.

The above image is the interface a user with role “Developer” should be able to see. The difference with a user with role “Open-Caller” is that Developer has the option to upload and push its OpenAPI Documentation to Kong API Gateway while Open-Caller has read-only access to portal.
Important: The OpenAPI documentation must be of version 3.0.0. and later to be uploaded to Kong gateway. The API Publisher is using the openapi2kong plugin (check in the link to sync your documentation) to pass openAPI documentations to KONG API Gateway.
Under the API DOCS we can found all the uploaded API documentations. Currently there is none, so lets upload one. To upload we enter the enabler’s name with a brief description about the enabler on the text boxes and we can upload our API documentation by clicking on upload file. Finally, we click on “Push documentation to Kong API Gateway” and that’s it! Our OpenAPI documentation is up to Kong Gateway an we can access our endpoints behind the API Gateway. In the testing cluster the Kong API Gateway address is http://10.10.10.2:30000/, so in order to access the endpoints we use an address of type: http://10.10.10.2:30000/myendpoint/.
1.4.4.4.2. Secure our APIs
To secure our API endpoints, we can simply add the following lines in our OpenAPI documentations (e.g., secure /get endpoint). We are using the Nokia OIDC plugin to secure API’s by using the OIDC protocol and Kong API Gateway.
get:
    get:
      x-kong-plugin-oidc:
        name: oidc
        enabled: true
        config:
          client_id: Kong
          client_secret: cHDH9hKVNg3Hm9jjRJqDjRvdWipcTZtx
          bearer_only: "yes"
          realm: OpenAPI
          introspection_endpoint: http://10.10.10.2:9120/auth/realms/OpenAPI/protocol/openid-connect/token/introspect
          discovery: http://10.10.10.2:9120/auth/realms/OpenAPI/.well-known/openid-configuration
      responses:
        "200":
          description: The request's query parameters.
      summary: The request's query parameters.
      tags:
        - HTTP Methods
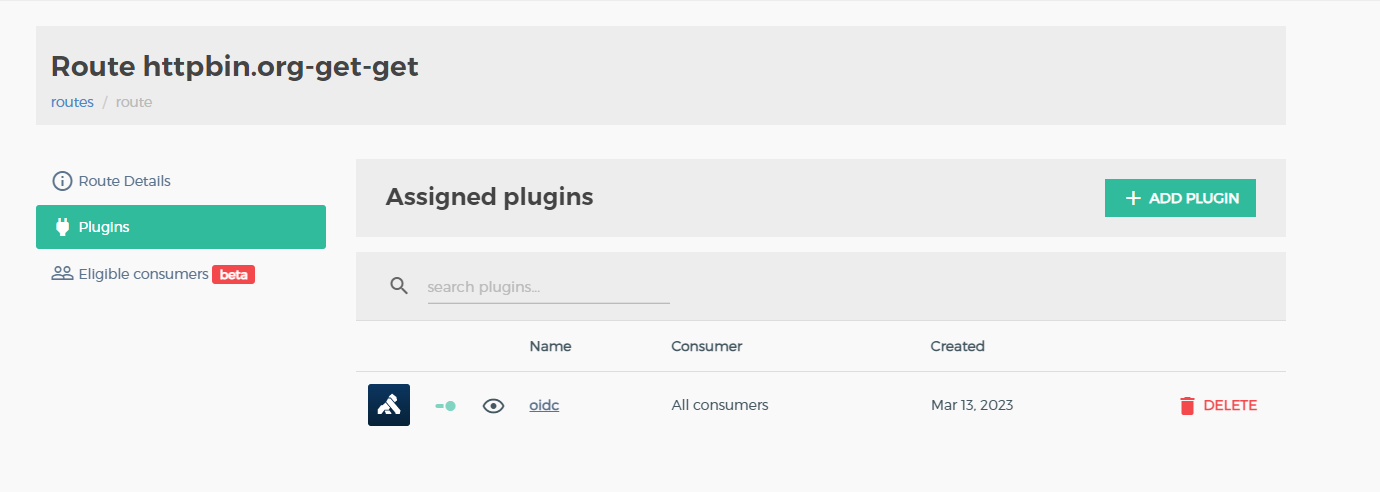
where client secret is the secret key of the Kong client that we created on the previous steps. We can then verify that the endpoint is secured by using Konga Manager and access the route /get :
To secure all the endpoints of our documentation we simply use the same plugin but we place it on the same level with “openapi”, “info”, “servers” etc.:
openapi: 3.0.2
servers:
- url: http://randurl.com
info:
  version: '2.0.0'

  title: Resource-provisioning OpenAPI

  license:
    name: Apache 2.0
    url: 'http://www.apache.org/licenses/LICENSE-2.0.html'
  x-logo:
    url: 'https://redocly.github.io/openapi-template/logo.png'

tags:
  - name: Endpoints

x-kong-plugin-oidc:
      name: oidc
      enabled: true
      config:
        client_id: kong
        client_secret: our_keycloak_secret_here
        bearer_only: "yes"
        realm: OpenAPI
        introspection_endpoint: http://10.10.10.2:9120/realms/OpenAPI/protocol/openid-connect/token/introspect
        discovery: http://10.10.10.2:9120/auth/realms/OpenAPI/.well-known/openid-configuration
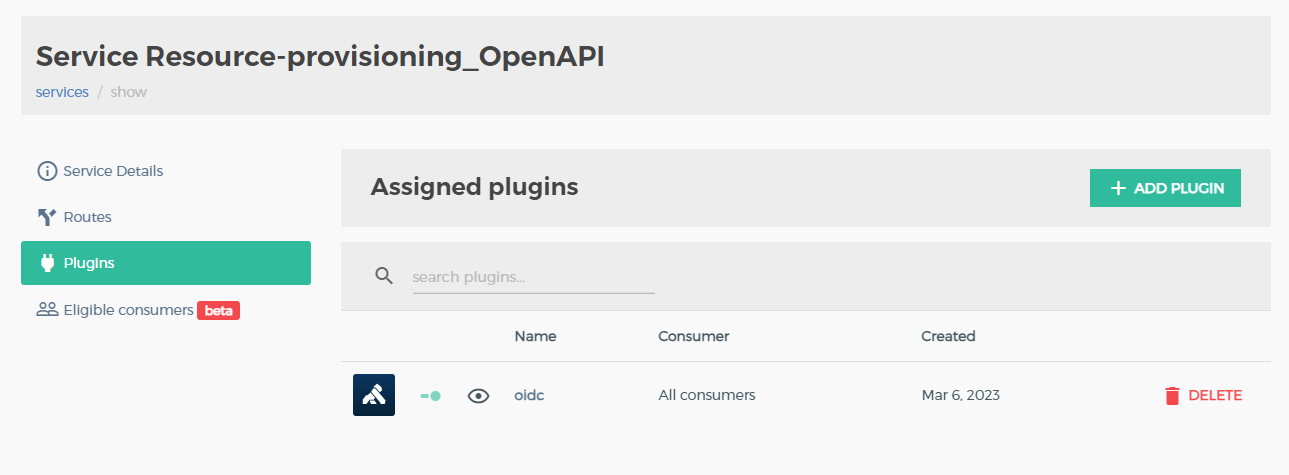
Then again we can verify with Konga that OIDC plugin is enabled by going to the service page that we created:
1.4.4.4.3. Access secured endpoints
To access our secured endpoints behind the API Gateway we use the public-backend-client to obtain access token from keycloak. We will also use demouser to login.
RAWTKN=$(curl -s -X POST \
        -H "Content-Type: application/x-www-form-urlencoded" \
        -d "username=demouser" \
        -d "password=demouser" \
        -d 'grant_type=password' \
        -d "client_id=public-backend-access" \
        http://10.10.10.2:9120/auth/realms/OpenAPI/protocol/openid-connect/token \
        |jq . )

echo $RAWTKN
{
  "access_token": "eyJhbGciOiJSUzI1NiIsInR5cCIgOiAiSldUIiwia2lkIiA6ICJENkhLTHlubllGVkEtNGZKLWFLR3o1ai0xMHNFQ2NBZTA1UUp0Y05xdEN3In0.eyJqdGkiOiI1NmNkOGYyYy1iZGViLTQ5ODktYjJjNi0zMzRmZjQwOWQxYzIiLCJleHAiOjE1Njc3NDc0MDcsIm5iZiI6MCwiaWF0IjoxNTY3NzQ3MTA3LCJpc3MiOiJodHRwOi8vMTkyLjE2OC44OC4yMTo4MTgwL2F1dGgvcmVhbG1zL2V4cGVyaW1lbnRhbCIsImF1ZCI6ImFjY291bnQiLCJzdWIiOiIxNTg0OWM0NS05ZTIxLTRmOTQtYjZmNC1hMzkyMTMyNmRkNGIiLCJ0eXAiOiJCZWFyZXIiLCJhenAiOiJteWFwcCIsImF1dGhfdGltZSI6MCwic2Vzc2lvbl9zdGF0ZSI6ImIxNGI2ODk0LTE1ZjQtNDE3Ni1iYjkwLWRiOThlYjg3OTRkNSIsImFjciI6IjEiLCJyZWFsbV9hY2Nlc3MiOnsicm9sZXMiOlsib2ZmbGluZV9hY2Nlc3MiLCJ1bWFfYXV0aG9yaXphdGlvbiJdfSwicmVzb3VyY2VfYWNjZXNzIjp7ImFjY291bnQiOnsicm9sZXMiOlsibWFuYWdlLWFjY291bnQiLCJtYW5hZ2UtYWNjb3VudC1saW5rcyIsInZpZXctcHJvZmlsZSJdfX0sInNjb3BlIjoicHJvZmlsZSBlbWFpbCIsImVtYWlsX3ZlcmlmaWVkIjp0cnVlLCJuYW1lIjoiRGVtbyBVc2VyIiwicHJlZmVycmVkX3VzZXJuYW1lIjoiZGVtb3VzZXIiLCJnaXZlbl9uYW1lIjoiRGVtbyIsImZhbWlseV9uYW1lIjoiVXNlciIsImVtYWlsIjoidGVzdEB0ZXN0LmNvbSJ9.i0S_8Bf9TfVbHHTIVTIMM-q4K65jLhzuXnRfUvXdCti0LfxjEl_vrj9dzsigUhi-C5JKRGyZYi3ZZn6rlpgWD0uzVDcl6jMnpFW4lrJukrKHGUVd6_VYLPkdRFnylmsYfuvMT2DdHBVhpFOzhnr1zP9cGGdFozUzd90Drj_P6l1wjWg47Jwgo5WsJCnr1jzcPY784Ao2Lz2jFZwiBSqWW1Hwj2uSZRXRvjjPd0_LUhGqSi5LFjTFni3eTLXPBwrjSZq_JBlk1hMEoMfp7JKnB5tF4poGSO2tRTd-3j80BlY6jwAyTDWDDw0-fdp_UrhW_10VaxPXNyHc0AgGXDkvDA",
  "expires_in": 300,
  "refresh_expires_in": 1800,
  "refresh_token": "eyJhbGciOiJIUzI1NiIsInR5cCIgOiAiSldUIiwia2lkIiA6ICIyZGZmMDI2MS01YzdjLTRmNGQtOTAxZS1lZjI3ZjM0YTNmNTUifQ.eyJqdGkiOiIyNjE2NDQyYi00ZTI5LTRmY2ItYTMzNi05ZTg5ZGZiNTUxNTgiLCJleHAiOjE1Njc3NDg5MDcsIm5iZiI6MCwiaWF0IjoxNTY3NzQ3MTA3LCJpc3MiOiJodHRwOi8vMTkyLjE2OC44OC4yMTo4MTgwL2F1dGgvcmVhbG1zL2V4cGVyaW1lbnRhbCIsImF1ZCI6Imh0dHA6Ly8xOTIuMTY4Ljg4LjIxOjgxODAvYXV0aC9yZWFsbXMvZXhwZXJpbWVudGFsIiwic3ViIjoiMTU4NDljNDUtOWUyMS00Zjk0LWI2ZjQtYTM5MjEzMjZkZDRiIiwidHlwIjoiUmVmcmVzaCIsImF6cCI6Im15YXBwIiwiYXV0aF90aW1lIjowLCJzZXNzaW9uX3N0YXRlIjoiYjE0YjY4OTQtMTVmNC00MTc2LWJiOTAtZGI5OGViODc5NGQ1IiwicmVhbG1fYWNjZXNzIjp7InJvbGVzIjpbIm9mZmxpbmVfYWNjZXNzIiwidW1hX2F1dGhvcml6YXRpb24iXX0sInJlc291cmNlX2FjY2VzcyI6eyJhY2NvdW50Ijp7InJvbGVzIjpbIm1hbmFnZS1hY2NvdW50IiwibWFuYWdlLWFjY291bnQtbGlua3MiLCJ2aWV3LXByb2ZpbGUiXX19LCJzY29wZSI6InByb2ZpbGUgZW1haWwifQ.CEBbW31oeMlzHHRw3nwRd0nKq4jFC0KbsUBm5yMw-Ao",
  "token_type": "bearer",
  "not-before-policy": 0,
  "session_state": "b14b6894-15f4-4176-bb90-db98eb8794d5",
  "scope": "profile email"
}
Let’s extract the access token:
export TKN=$(echo $RAWTKN | jq -r '.access_token')
~
echo $TKN
eyJhbGciOiJSUzI1NiIsInR5cCIgOiAiSldUIiwia2lkIiA6ICJENkhLTHlubllGVkEtNGZKLWFLR3o1ai0xMHNFQ2NBZTA1UUp0Y05xdEN3In0.eyJqdGkiOiI1NmNkOGYyYy1iZGViLTQ5ODktYjJjNi0zMzRmZjQwOWQxYzIiLCJleHAiOjE1Njc3NDc0MDcsIm5iZiI6MCwiaWF0IjoxNTY3NzQ3MTA3LCJpc3MiOiJodHRwOi8vMTkyLjE2OC44OC4yMTo4MTgwL2F1dGgvcmVhbG1zL2V4cGVyaW1lbnRhbCIsImF1ZCI6ImFjY291bnQiLCJzdWIiOiIxNTg0OWM0NS05ZTIxLTRmOTQtYjZmNC1hMzkyMTMyNmRkNGIiLCJ0eXAiOiJCZWFyZXIiLCJhenAiOiJteWFwcCIsImF1dGhfdGltZSI6MCwic2Vzc2lvbl9zdGF0ZSI6ImIxNGI2ODk0LTE1ZjQtNDE3Ni1iYjkwLWRiOThlYjg3OTRkNSIsImFjciI6IjEiLCJyZWFsbV9hY2Nlc3MiOnsicm9sZXMiOlsib2ZmbGluZV9hY2Nlc3MiLCJ1bWFfYXV0aG9yaXphdGlvbiJdfSwicmVzb3VyY2VfYWNjZXNzIjp7ImFjY291bnQiOnsicm9sZXMiOlsibWFuYWdlLWFjY291bnQiLCJtYW5hZ2UtYWNjb3VudC1saW5rcyIsInZpZXctcHJvZmlsZSJdfX0sInNjb3BlIjoicHJvZmlsZSBlbWFpbCIsImVtYWlsX3ZlcmlmaWVkIjp0cnVlLCJuYW1lIjoiRGVtbyBVc2VyIiwicHJlZmVycmVkX3VzZXJuYW1lIjoiZGVtb3VzZXIiLCJnaXZlbl9uYW1lIjoiRGVtbyIsImZhbWlseV9uYW1lIjoiVXNlciIsImVtYWlsIjoidGVzdEB0ZXN0LmNvbSJ9.i0S_8Bf9TfVbHHTIVTIMM-q4K65jLhzuXnRfUvXdCti0LfxjEl_vrj9dzsigUhi-C5JKRGyZYi3ZZn6rlpgWD0uzVDcl6jMnpFW4lrJukrKHGUVd6_VYLPkdRFnylmsYfuvMT2DdHBVhpFOzhnr1zP9cGGdFozUzd90Drj_P6l1wjWg47Jwgo5WsJCnr1jzcPY784Ao2Lz2jFZwiBSqWW1Hwj2uSZRXRvjjPd0_LUhGqSi5LFjTFni3eTLXPBwrjSZq_JBlk1hMEoMfp7JKnB5tF4poGSO2tRTd-3j80BlY6jwAyTDWDDw0-fdp_UrhW_10VaxPXNyHc0AgGXDkvDA
Now that we have the access token we can use it to call our APIs
curl "http://10.10.10.2:30000/myendpoint" \
-H "Accept: application/json" \
-H "Authorization: Bearer $TKN"
1.4.4.4.4. Register documentation using back-end commands.
If we want to bypass the portal and directly we can use the back-end Publisher API with the access token we had from the previous step:
curl -X 'POST' \
  'http://10.10.10.2:30900/OpenAPIDocumentation/?enabler=test&description=test' \
  -H 'accept: application/json' \
  -H 'Authorization: Bearer eyJhbGciOiJSUzI1NiIsInR5cCIgOiAiSldUIiwia2lkIiA6ICJLVWxfcFN3UjJnZHB1aW0xVTNWQ1BpZnk4ZG5NU0NJVXlXTVNTcWtSM2lNIn0.eyJleHAiOjE2Nzg3ODI0ODcsImlhdCI6MTY3ODc4MjE4NywiYXV0aF90aW1lIjoxNjc4NzgyMTg3LCJqdGkiOiI0NGE0ZGRhZi0yYzY4LTRlMzUtYjQ5MS00ZmU4OTIzZWFiMTEiLCJpc3MiOiJodHRwOi8vMTAuMTAuMTAuMjo5MTIwL2F1dGgvcmVhbG1zL09wZW5BUEkiLCJhdWQiOiJhY2NvdW50Iiwic3ViIjoiZDdhN2Y0MzMtMzI2NC00OGJmLTg3OWMtNDQ4MDEzNzNhN2Q5IiwidHlwIjoiQmVhcmVyIiwiYXpwIjoicHJpdmF0ZS1iYWNrZW5kIiwic2Vzc2lvbl9zdGF0ZSI6ImI1N2ExMTJhLTM2ZTYtNDczOC04NDk1LTZiMzhmMzEzNDNkZSIsImFjciI6IjEiLCJhbGxvd2VkLW9yaWdpbnMiOlsiaHR0cDovLzEwLjEwLjEwLjI6MzA5MDAiXSwicmVhbG1fYWNjZXNzIjp7InJvbGVzIjpbImRlZmF1bHQtcm9sZXMtb3BlbmFwaSIsIm9mZmxpbmVfYWNjZXNzIiwiRGV2ZWxvcGVyIiwidW1hX2F1dGhvcml6YXRpb24iXX0sInJlc291cmNlX2FjY2VzcyI6eyJhY2NvdW50Ijp7InJvbGVzIjpbIm1hbmFnZS1hY2NvdW50IiwibWFuYWdlLWFjY291bnQtbGlua3MiLCJ2aWV3LXByb2ZpbGUiXX19LCJzY29wZSI6InByb2ZpbGUgZW1haWwiLCJzaWQiOiJiNTdhMTEyYS0zNmU2LTQ3MzgtODQ5NS02YjM4ZjMxMzQzZGUiLCJlbWFpbF92ZXJpZmllZCI6dHJ1ZSwicHJlZmVycmVkX3VzZXJuYW1lIjoiZGVtb3VzZXIiLCJnaXZlbl9uYW1lIjoiIiwiZmFtaWx5X25hbWUiOiIifQ.jCgFDadRQ8fYzk5aQGlWEx5PaPB2spts9fw0T0jOF80Tnj4k5CVTJEgVOWKygCfR0QniNIAsTJsDIOahNkItravThT6jfv9-WSFaBWlAlI7iZn8LxXbXRHYn2C7nL8hlbMnImVkauYyVxOXFlm4Fma9ACfE9zMDE2AjCB96WA9TK40lc0vcPycVRMYUgLvEf8kPUkHHlF8ulxoqczKLwn8afC155JkBqNBHoEaoSAYQDZz8VzwlSoOfvbpIs1SG02G61EBBHfRA0WSs87AkZVuC9H9Y-Cc-9wvjz5i2Y8pWxmM39MW8uUCA4QABmATDzbTRR7VTUL3hvfb7y3-HlPA' \
  -H 'Content-Type: multipart/form-data' \
  -F 'upload_file=@my-enabler.yaml'
1.4.4.4.5. Register endpoints without uploading API documentation
Although every enabler in Assist-IoT will have its own OpenAPI documentation and that will be available through the portal and will be used to automatically register all the endpoints of the enabler to Kong API Gateway, sometimes if the documentation is not ready we can register the endpoints directly to Kong. To to so, we have two options. Register endpoints by using the command line with Kong admin API and register endpoints by using the Konga Manager Portal. In both occasions we are creating services and routes which is the traditional way that Kong operates.
We will list down some additional documentation of Kong and Konga which gives a detailed approach on how to create services and routes:
1.4.4.5. Prerequisites
Keycloak IdM
jq
linux OS
Docker
Kubectl
Helm
1.4.4.6. Installation
To install the OpenAPI Management Enabler we are using Helm Charts, but first we need to configure Keycloak IdM.
1.4.4.6.1. Keycloak Configuration
In order to integrate with Keycloak IdM we need to create to create a realm and three clients and an optional 4th client that we will use to get access tokens from keycloak:
Realm: OpenAPI
client 1: private-backend
client 2: public-frontend
client 3: kong
client 4: public-backend-access
To create a Realm in Keycloak on the left side bar menu we click on the drop-down options on the On the top left (By default Master Realm) and we click on Create Realm and we name the new realm OpenAPI. Then, on the left side-bar menu we click on clients, create client to create our clients.
In this documentation we are using the address of the testing cluster in Assist-IoT (10.10.10.2) to configure keycloak. This address should be modified according to the cluster that the enabler will be installed.
1.4.4.6.1.1. Create private-backend client.
To create private-backend we add our client name and click on next.

On the next tab we change the client authentication option to On

This option creates a client secret key which will be used in next steps to secure the endpoints of the back-end.
We will use nodePorts to install our services so the ip of every service will be of type: http://nodeIP:nodePort. Where in our case nodeIP is the IP of the cluster node 10.10.10.2 (e.g., http://10.10.10.2:30900 for the backend).
Next, we need to configure Access setting as follows:

And we click on save to save our client.
1.4.4.6.1.2. Create public-frontend client.
To create public-frontend client again under the tab clients, we click on create client.
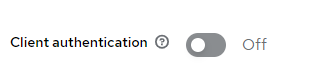
This time we let the client-authentication option to off.
And on the next tab we fill the same settings as the private-bakcend client, this time the URL is http://10.10.10.2:30300 .
1.4.4.6.1.3. Create public-backend-access client.
This client will used to login when using backend commands. Therefore, the only thing we need to specify is the name of the client with the option client-authentication set to off. Later we will use this client to obtain access token from keycloak.
1.4.4.6.1.4. Create kong-client
The kong client has exactly the same settings as the private backend client:
client authentication is set to On .
Access settings filled as before with the URL: http://10.10.10.2:30000 .
1.4.4.6.1.5. Create a demo-users
On this step we are going to configure three users:
demouser
demodeveloper: user that has the rights of a developer in Assist-IoT, therefore can push documentations.
demoopencaller: user that has the rights of an open-caller in Assist-IoT, therefore can only read documentations and has not access to push.
To create those demo users, on the left side-bar menu we click on the tab Users. Next, on the create user menu we click on create user button. We set the email-verified option to on and we press create. .. image:: images/create-user.png
Next on the user profile we click on the credentials tab, Set password to set credentials for the user. We set the password to be the same as the username:
demouser, password: demouser .
demodeveloper, password: demodeveloper .
demoopencaller, password: demoopencaller .
Don’t forget to set temporary option to off when setting the password.
Finally, we will create two roles: the developer and the open-caller. On the left side-bar menu we click on realm-roles, create role.
We create a role with the name “Developer” and description “Assist-IoT developer” and a role with the name “Open-Caller” and description “Assist-IoT open-caller”.
To assign those roles we click on the left side-bar menu we click on tab users,chose our user, Role Mapping, Assign role, and we assign the role “Developer” to demouser, demodeveloper and the role “Open-Caller” to demoopencaller.
1.4.4.6.2. Configure Helm values
With the correct Keycloak configuration in place we are now ready to configure the values file in our helm charts.
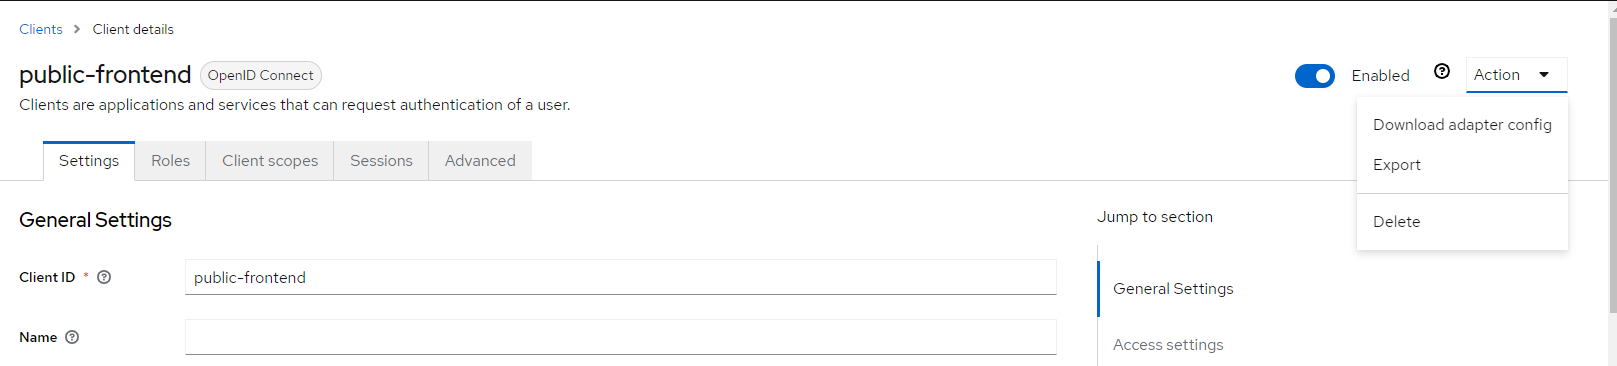
First, we need to provide the front-end with the appropriate Keycloak configuration to get that information on keycloak, we click on client public-frontend and on the top right of the page we click on Action, Download adapter config.

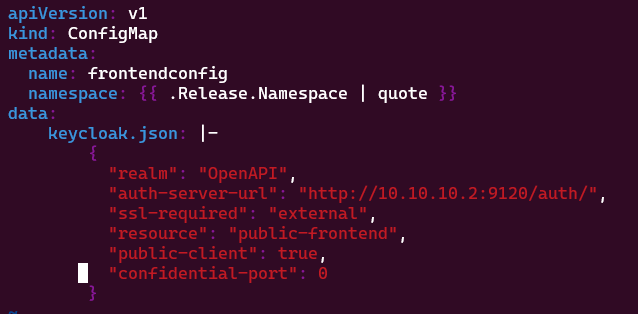
We overight the json on the file templates/configmaps/frontendconfig.yaml with the keycloak OIDC JSON file.
On the values.yaml file we need to modify some URLs passed as env variables on backend and frontend services with the correct addresses as follows:
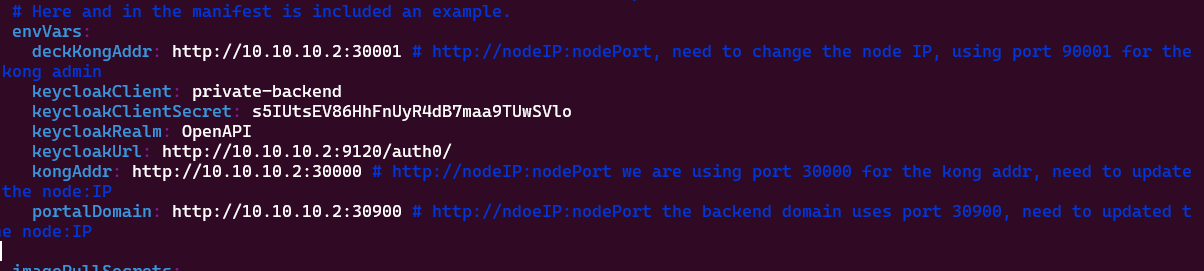
PS: correct keycloakUrl value here should be http://10.10.10.2:9120/auth/ .
To find the keycloak secret key on the private-client page we click on credentials tab.
We also need to update the frontend environment variables as follows:

To install the helm charts we using the follwing command:
helm install openapi ./openapi-enabler
Where openapi-enabler is the directory where the helm charts are loacated.
1.4.4.7. Configuration options
1.4.4.7.1. Configure Konga Manager
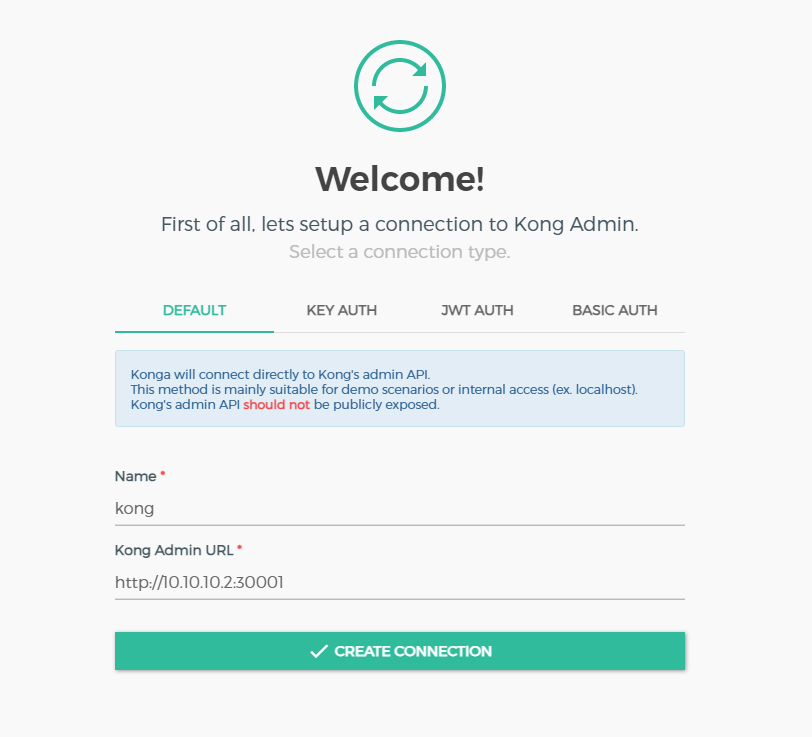
To configure Konga manager we visit http://10.10.10.2:31337 and we create an admin account. For the testing cluster we use username: admin and password: adminadminadmin.
To connect Konga manager with Kong API gateway we need provide konga with KONG’s admin URL. In our case KONG Admin URL is http://10.10.10.2:30001. Thus, to create a connection with Kong we fill in the the following form:
The configuration options will be provided after the release of the enabler.
1.4.4.8. Developer guide
Please refer to official Kong API Gateway documentation
1.4.4.9. Version control and release
Kong API Gateway v2.8
Version 0.2.0. Fully functional and able to retrieve all data even if the cluster fails.
1.4.4.10. License
OpenAPI management enabler is under BSD 3-Clause “New” or “Revised” License.
1.4.4.11. Notice(dependencies)
NOTE: The OpenAPI Gateway Management Enabler operates independently and does not require any other enablers to be installed. The Assist-IoT enablers publish their APIs through the OpenAPI Management Enabler.
The software included is:
Kong API Gateway (https://github.com/Kong/kong) Apache 2.0 License
Konga GUI (https://github.com/pantsel/konga) MIT License (MIT)
Python (https://www.python.org/)
JavaScript (https://developer.mozilla.org/en-US/docs/Web/JavaScript/Guide/Introduction)
OpenAPI Specification (https://github.com/OAI/OpenAPI-Specification) Apache 2.0 License
Swagger UI (https://github.com/swagger-api/swagger-ui) Apache 2.0 License